25 Easy Christmas Nail Ideas: Get Festive Manicures
Forget the idea that Christmas nails are just another item on the exhaustive holiday checklist, sandwiched between wrapping gifts and perfecting the gingerbread recipe. For too long, we’ve treated nail art as a disposable accessory—something you quickly do before the party. But what if your manicure could be more?
Think about that moment: you’re holding a warm mug of cocoa, or handing a perfectly wrapped gift to someone you love. Where do everyone’s eyes naturally land? Right on your hands. Your nails aren’t just paint; they are the most visible, portable piece of festive cheer you wear all season. They are an instant mood-booster, a conversation starter, and the simplest way to tell the world, “I am fully in the holiday spirit,” without saying a word.
This year, we’re challenging the old assumption that festive nails must be complicated, messy, or strictly reserved for a salon visit. We’re moving beyond the basic red and green—though we’ll celebrate those classics, too! We’re going to show you 25 designs, ranging from the elegantly minimalist (perfect for the office party) to the dazzling and intricate (ready for New Year’s Eve). More importantly, we’re giving you the confidence to try them.
Instead of just a list of ideas, consider this your personal holiday nail playbook. We’ve anticipated the roadblocks—the “I don’t have long nails!” panic, the fear of complicated tools, and the belief that DIY always means disaster. Whether you have 15 minutes and a bottle of glitter (check out our easy DIY section!) or a full afternoon to perfect a snowflake accent, you will find a design here that not only looks spectacular but transforms the way you feel when you step out the door. Get ready to finally nail the festive season, quite literally.
Classic & Traditional Festive Manicures
These are the staples—the colors and patterns that immediately transport you to a cozy, nostalgic holiday setting.
1. The Iconic Candy Cane Stripe
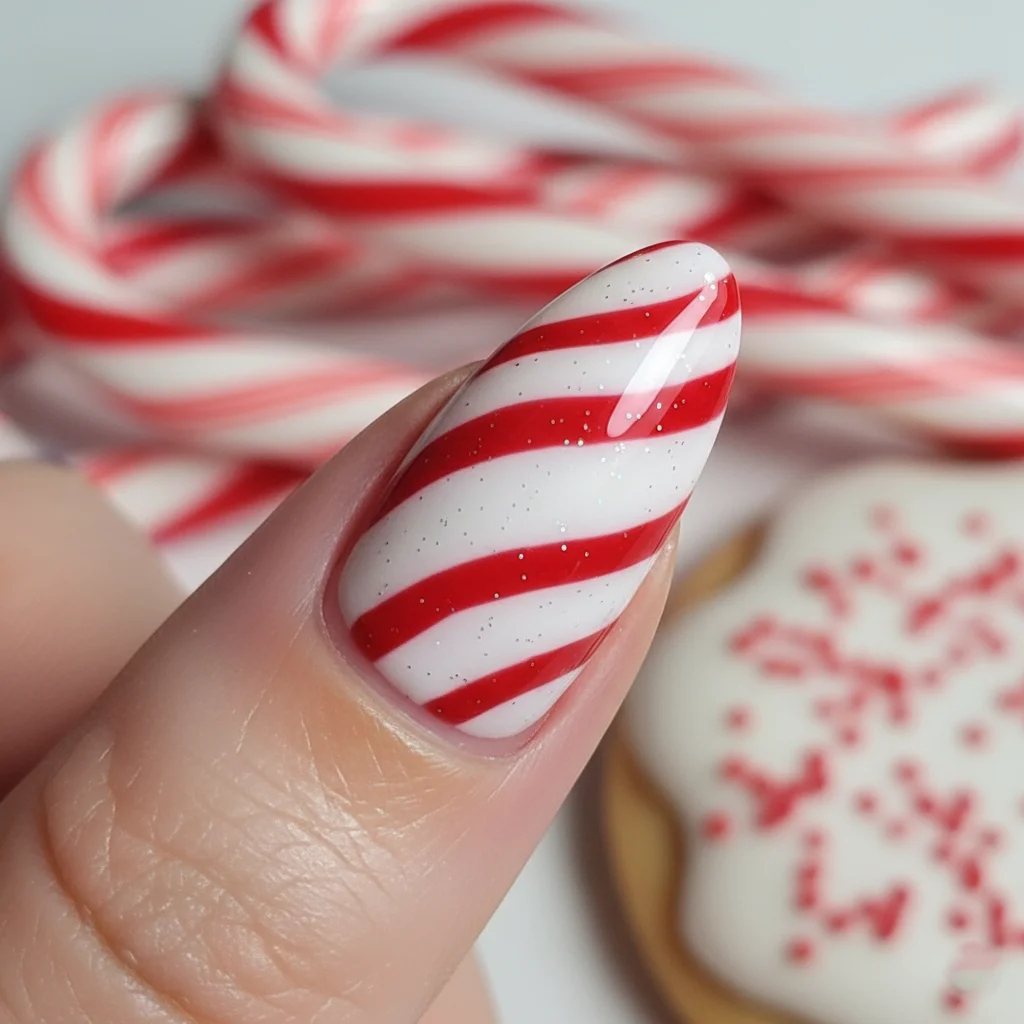
The secret to making this classic feel fresh is precision and placement. Instead of striping every nail (which can look busy), use a nude base and add two to three thin, perfectly spaced diagonal stripes of bold red and crisp white on an accent nail. Insight: Use a striping brush and apply white first, then use the red to frame the white stripe for a high-contrast pop.
2. Deep Emerald & Dazzling Gold Glitter
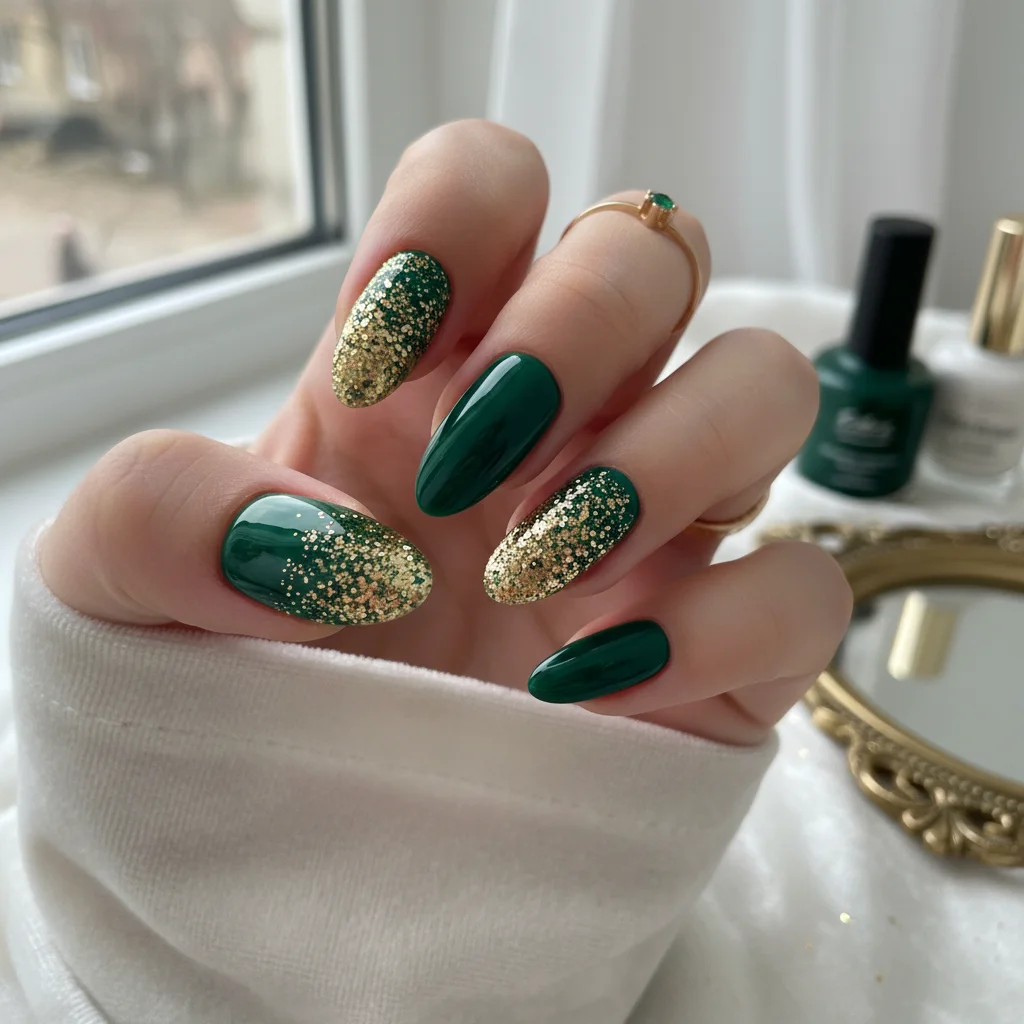
This is the manicure that says sophisticated luxury. Paint all nails a rich, deep emerald green. On one or two nails, apply a dense, high-impact gold glitter polish. Value Tip: If you don’t have a good glitter polish, paint a normal gold polish and immediately dip the wet nail into loose gold craft glitter, then seal generously with topcoat for a stunning, dimensional look.
3. The Subtle Holly Berry Accent Nail
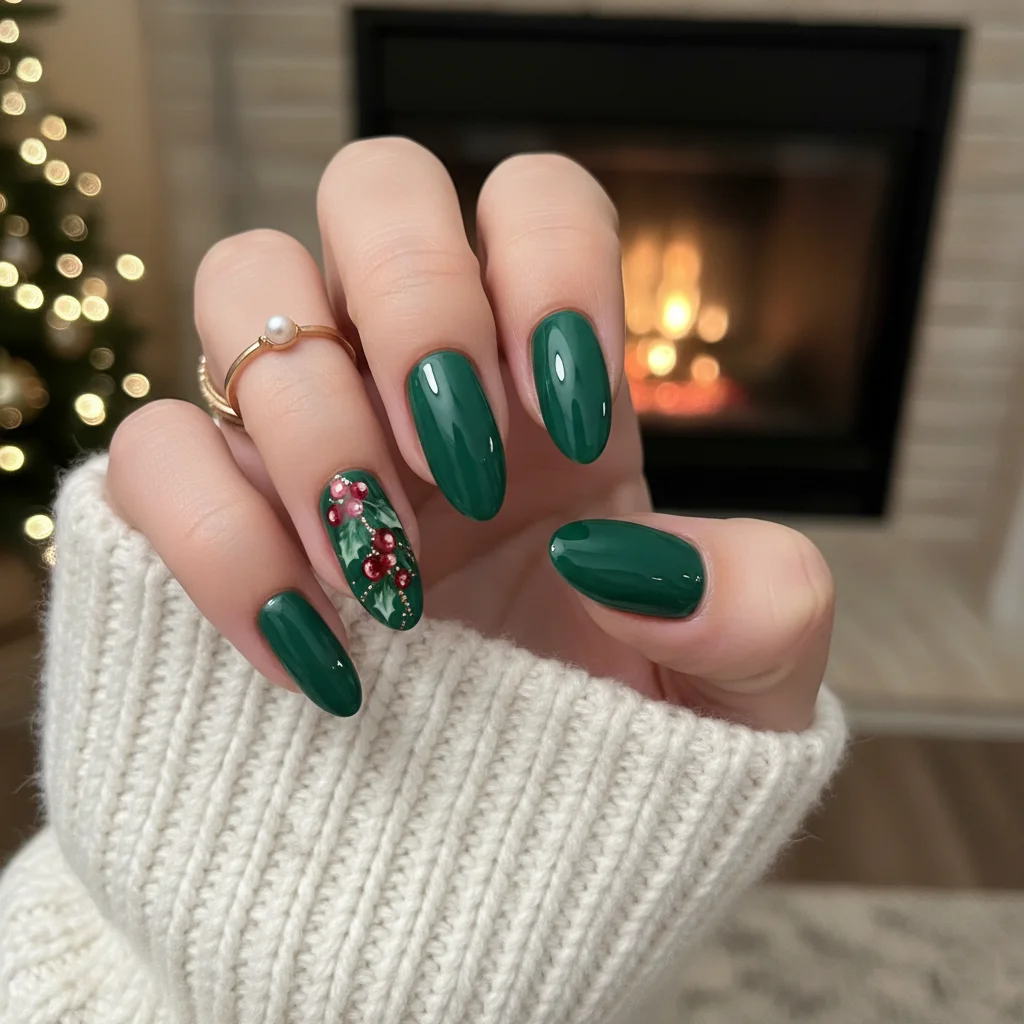
Want festive flair without being over-the-top? This is your solution. Paint four nails in a classic Christmas red. On the accent finger (like the ring finger), use a simple white or nude base. Using a small dotting tool and green polish, paint two tiny, curved leaves. Then, use the red polish to place two or three small dots for the berries. It’s elegant, miniature art.
4. Cozy Christmas Plaid Perfection
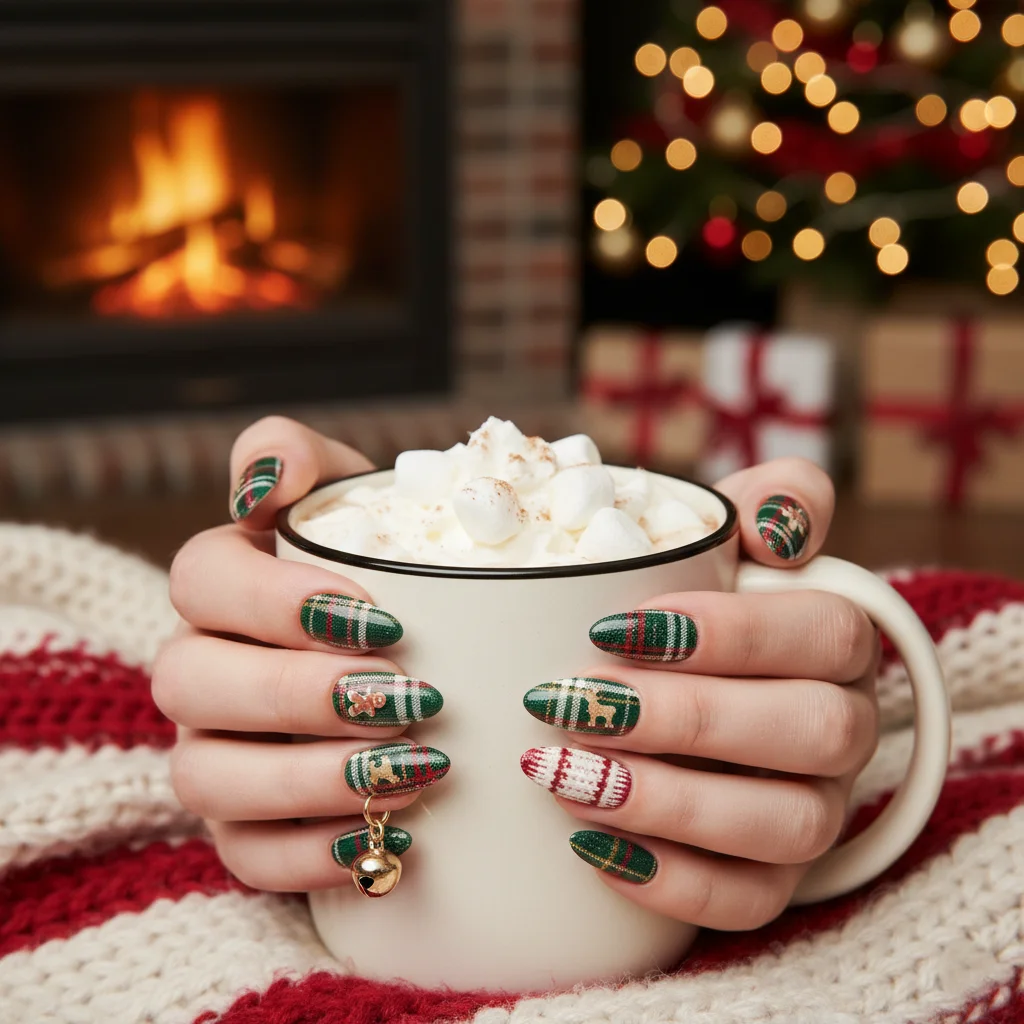
Plaid might seem impossible, but a striping brush and two complementary colors make it accessible. Choose a base color (like white or forest green). Use thin striping tape or a fine brush to lay down two thin vertical lines in red. Repeat with two horizontal lines in black or gold. Framework: Keep your lines slightly imperfect; it adds to the cozy, hand-drawn charm!
5. Snowfall Glitter French Tips
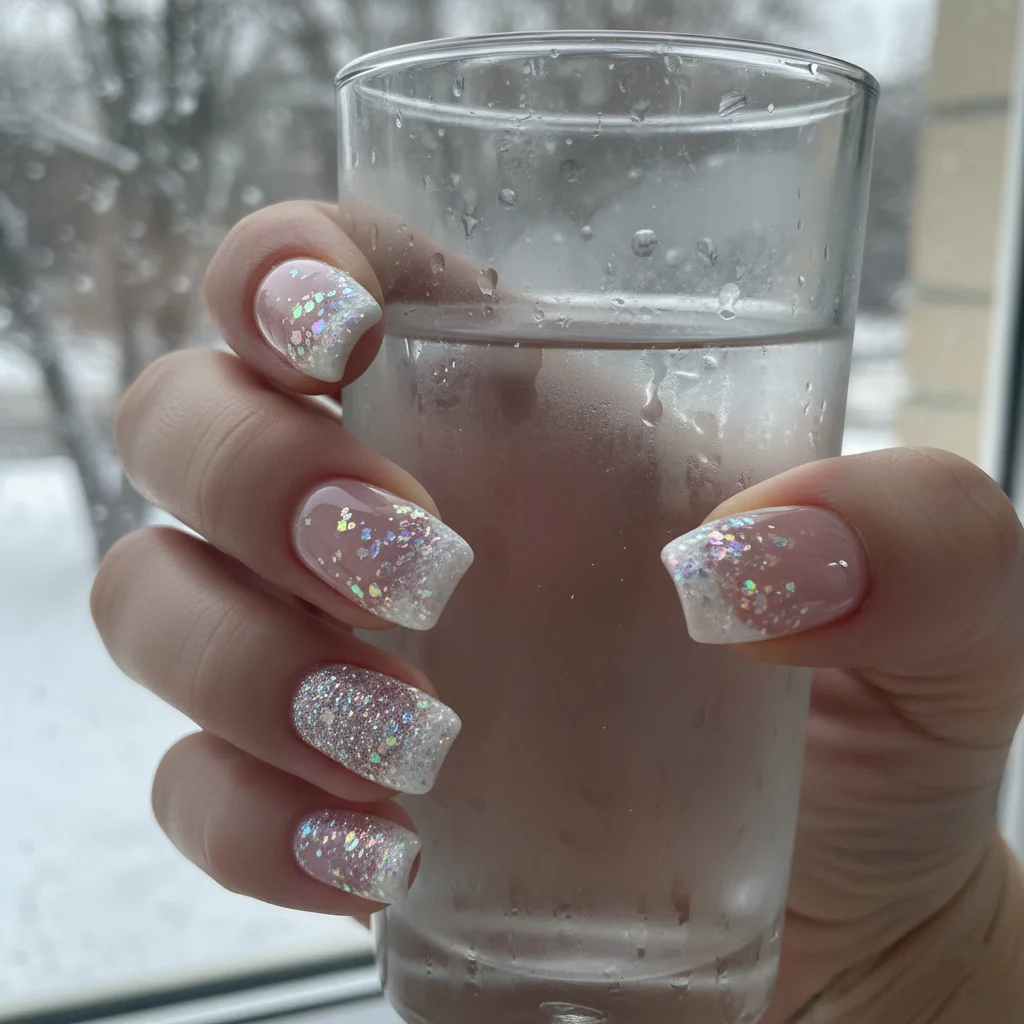
This design gives the traditional French manicure a holiday glow-up. Instead of a solid white tip, use a shimmery, dense white or silver glitter polish to paint the tip. Finish with a clear topcoat that has holographic flakes. It looks like fresh powder catching the light.
Modern & Elegant Holiday Looks
If red and green aren’t your colors, these designs offer a chic, minimalist approach to the holidays using texture, negative space, and modern colors.
6. Matte Midnight Blue & Sleek Silver
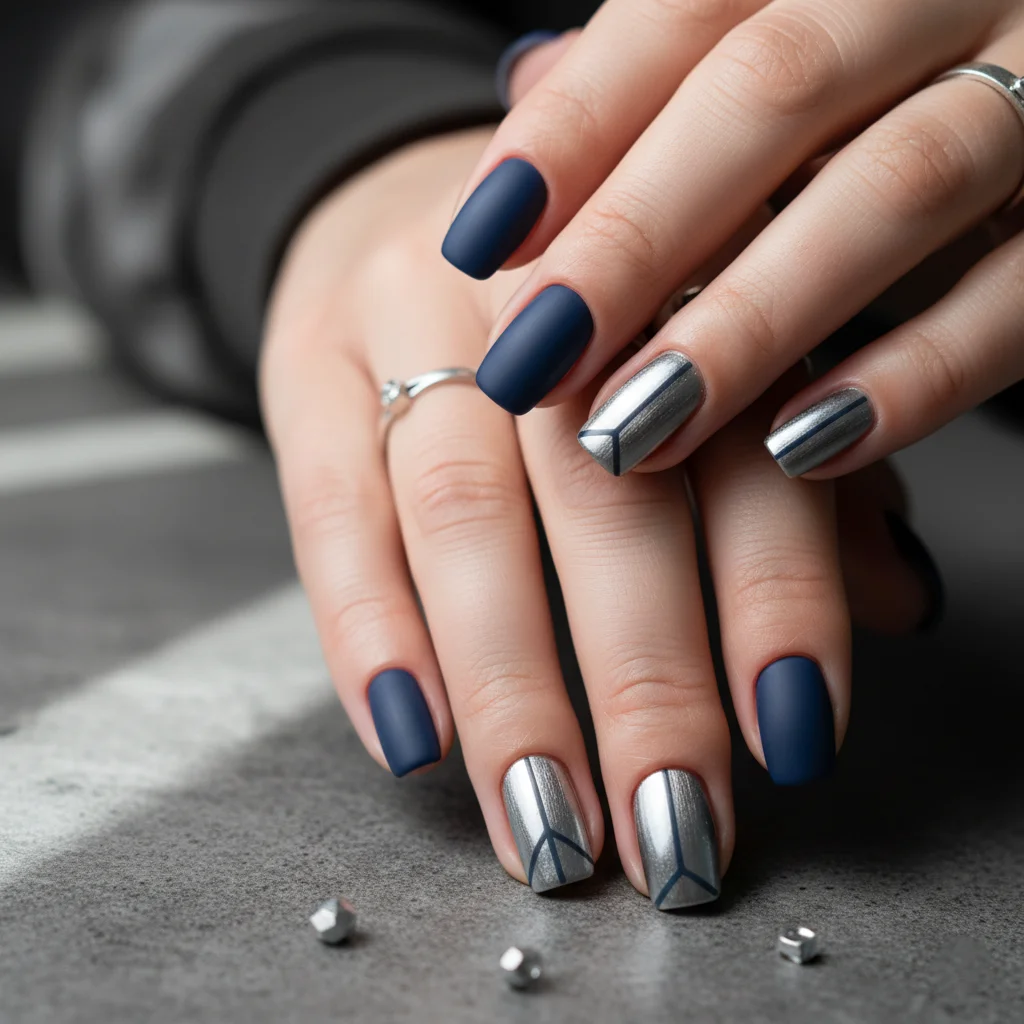
Ditch the gloss for a velvety matte topcoat over a deep, inky blue (almost black). The contrast is stunning. On the ring finger, use a metallic silver polish to paint a crisp geometric shape, like a small triangle near the cuticle. The shine of the silver against the flat blue makes an immediate visual impact.
7. Minimalist Gold Flakes on a Nude Base
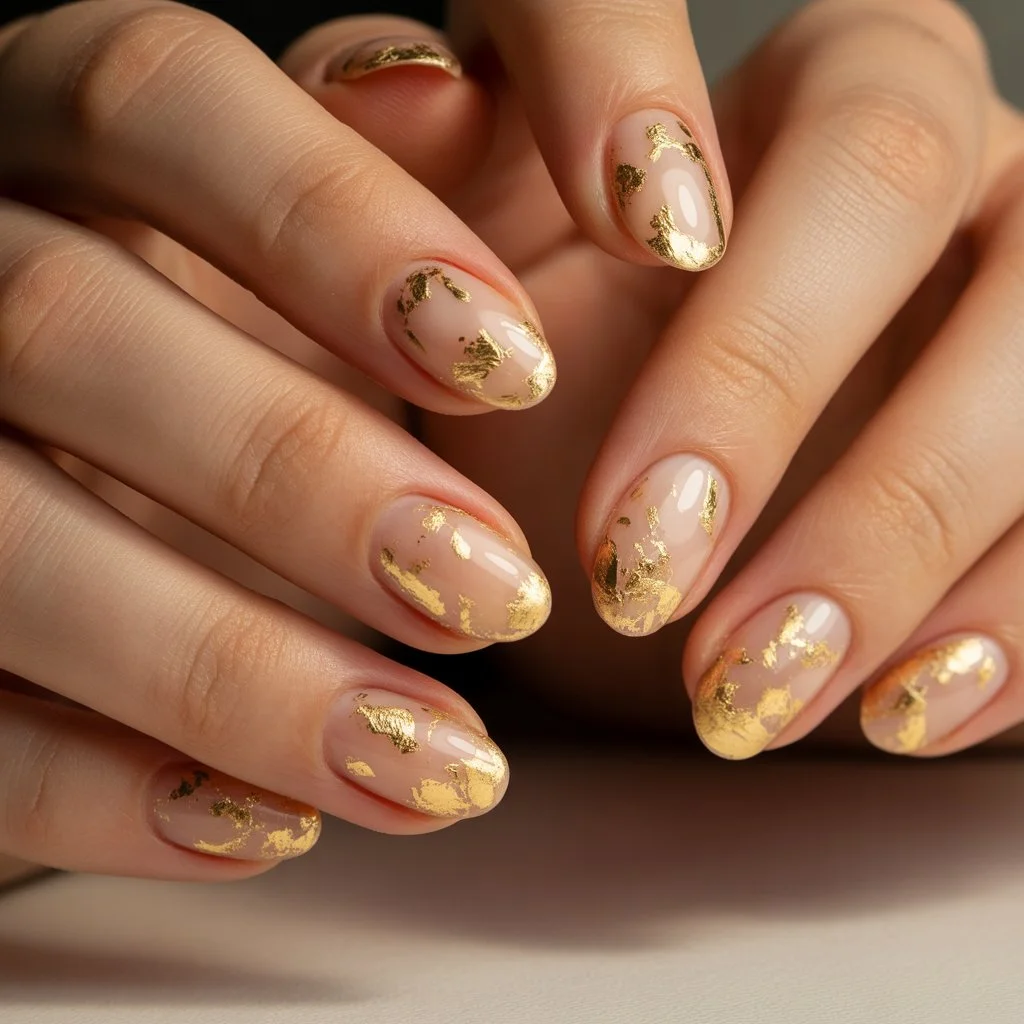
This design epitomizes quiet luxury. Paint your nails a sheer, neutral nude that matches your skin tone. Apply tiny flakes of gold foil sporadically across the nail, concentrating the flakes more heavily near the cuticle or the tip. Actionable Result: This is the perfect manicure for short nails; the clear space makes them look longer and cleaner.
8. Chic Negative Space Christmas Trees
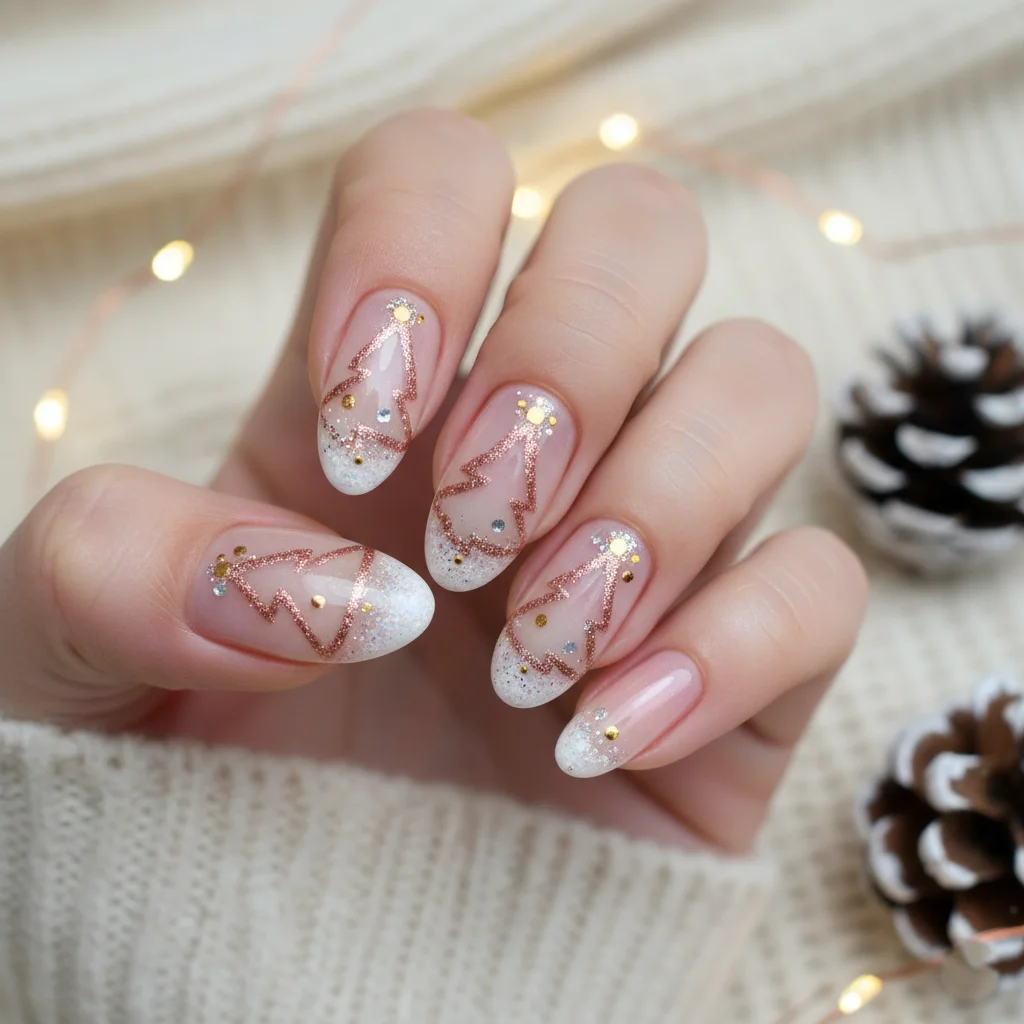
This is where you truly challenge assumptions about nail art! Start with a clean, clear base coat. Use a thin brush and a rich green polish to outline a basic triangle on the nail, leaving the center of the nail clear or “negative.” You see the festive shape without the commitment of full coverage.
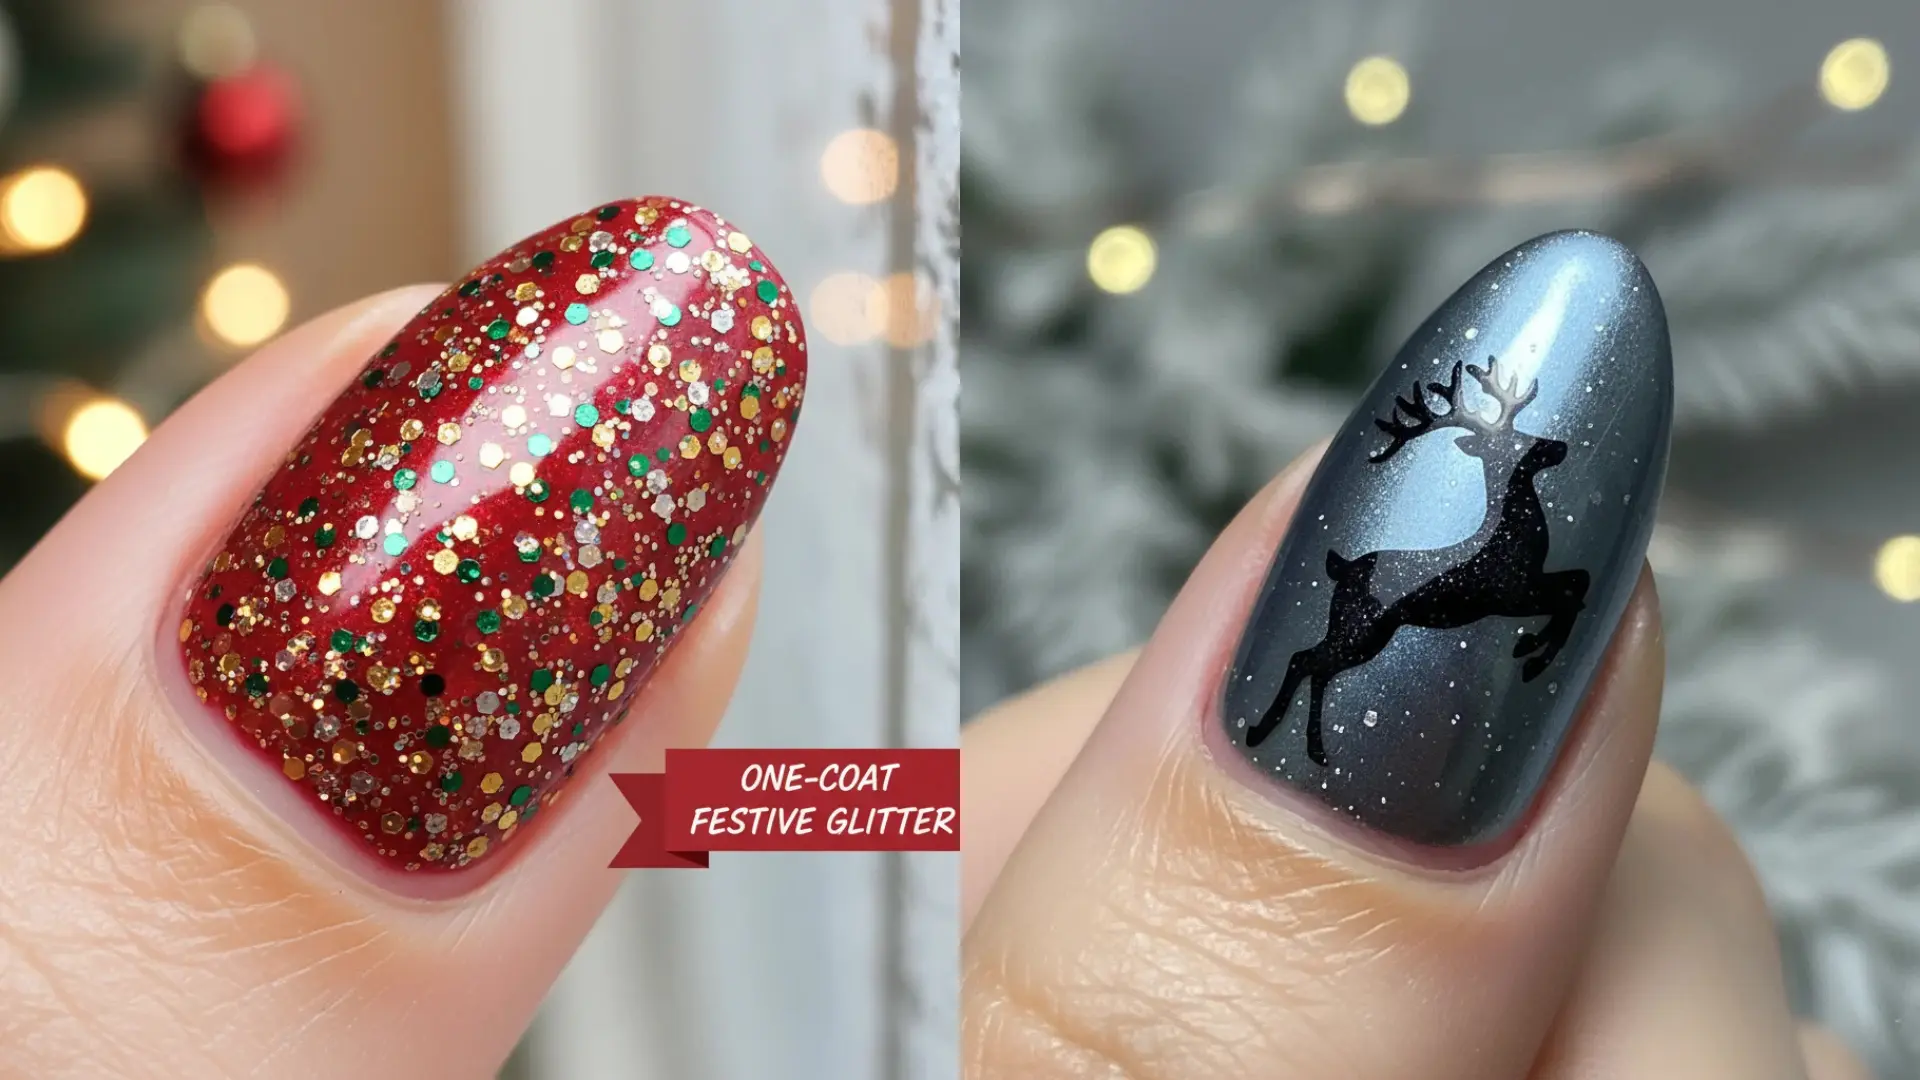
9. Chrome Reindeer Silhouette
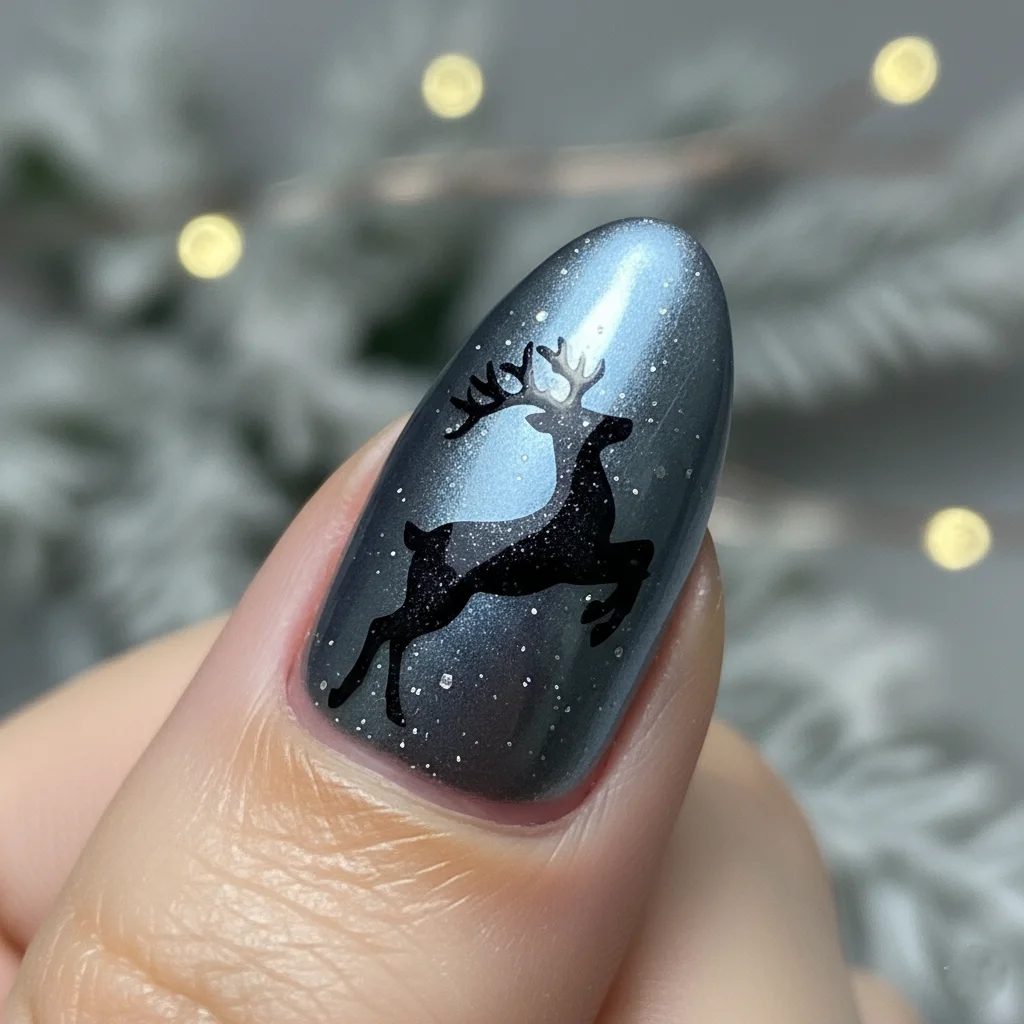
Chrome powders are huge right now. Apply a mirror-like chrome base (silver or rose gold). Using a small stamp or vinyl stencil, apply a black polish in the shape of a simple reindeer or star silhouette. The reflective background makes the black shape truly pop.
10. The Luxurious ‘Velvet’ Red Manicure
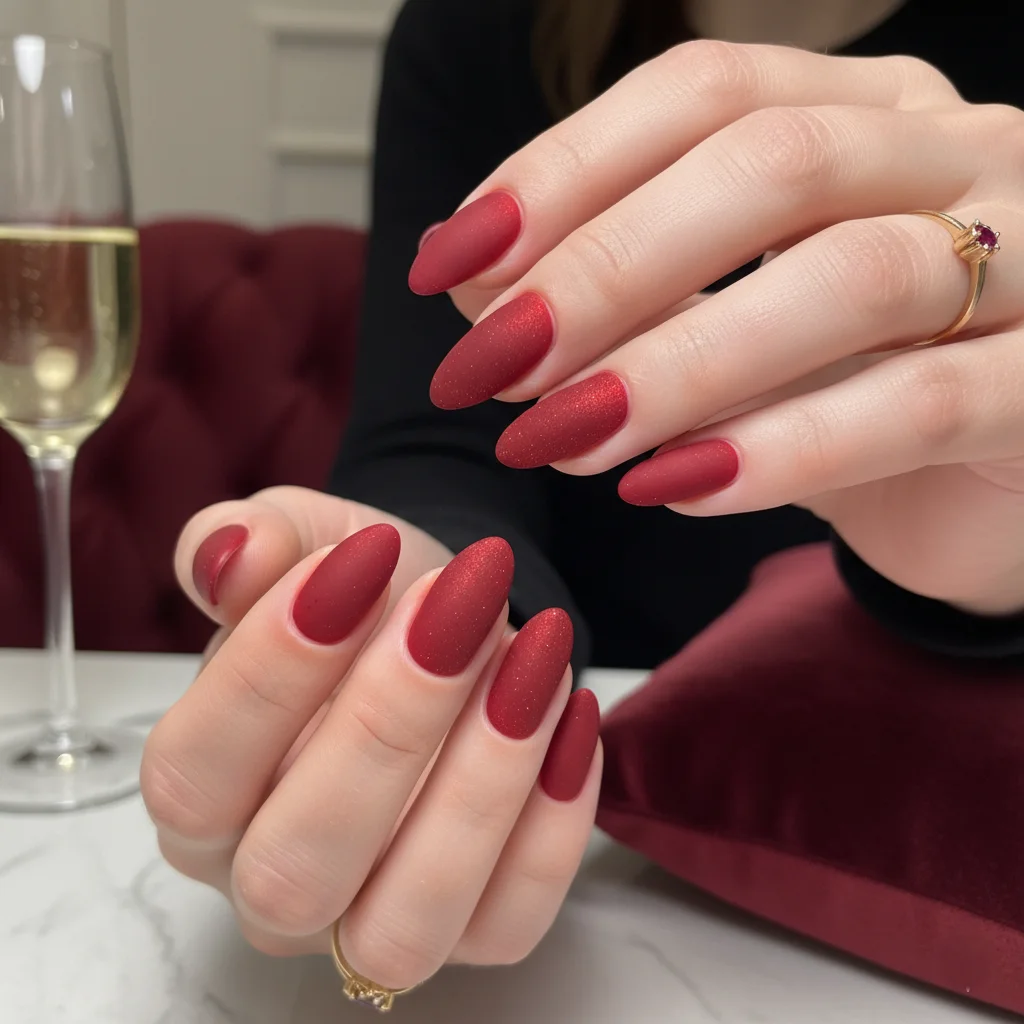
A texture revolution! Achieve this look using a magnetic polish (usually found in deep reds or burgundies). The polish has tiny metallic particles; when you hold the special magnet over the wet polish, it pulls the particles into a shimmering, diagonal line, giving the illusion of soft, folded velvet fabric. Insight: This technique works best over a matching solid color base coat.
Cute & Fun Christmas Nail Art Ideas
Ready to let your inner child out? These playful, cheerful designs are perfect for festive gatherings and family fun.
11. Simple & Sweet Santa Hat Tips
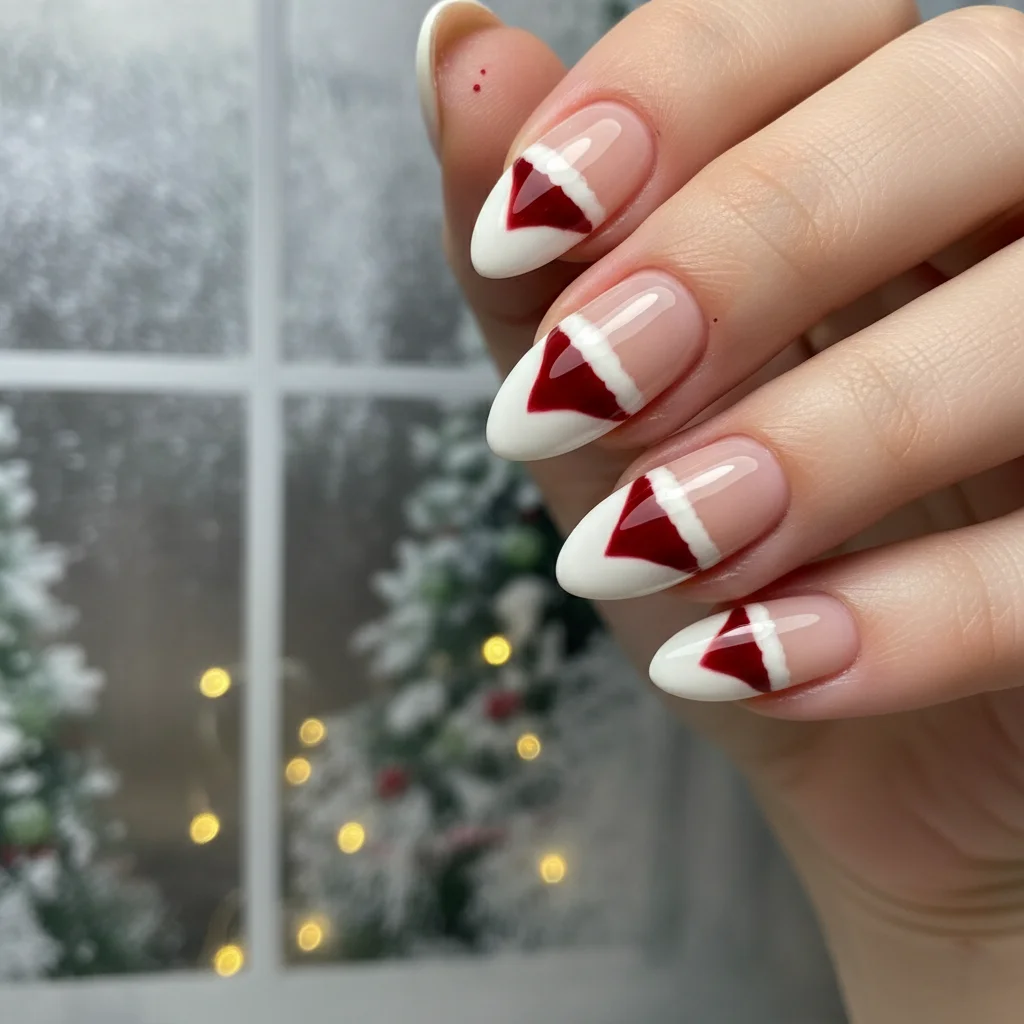
Instead of a traditional tip, paint your nail tip a crisp red. Then, use a fine brush to paint a small white triangle over the red, giving it the shape of a Santa hat brim. Add a small white dot at the corner for the pom-pom. It’s a fun twist on the French manicure!
12. Tiny Gingerbread Man Minis
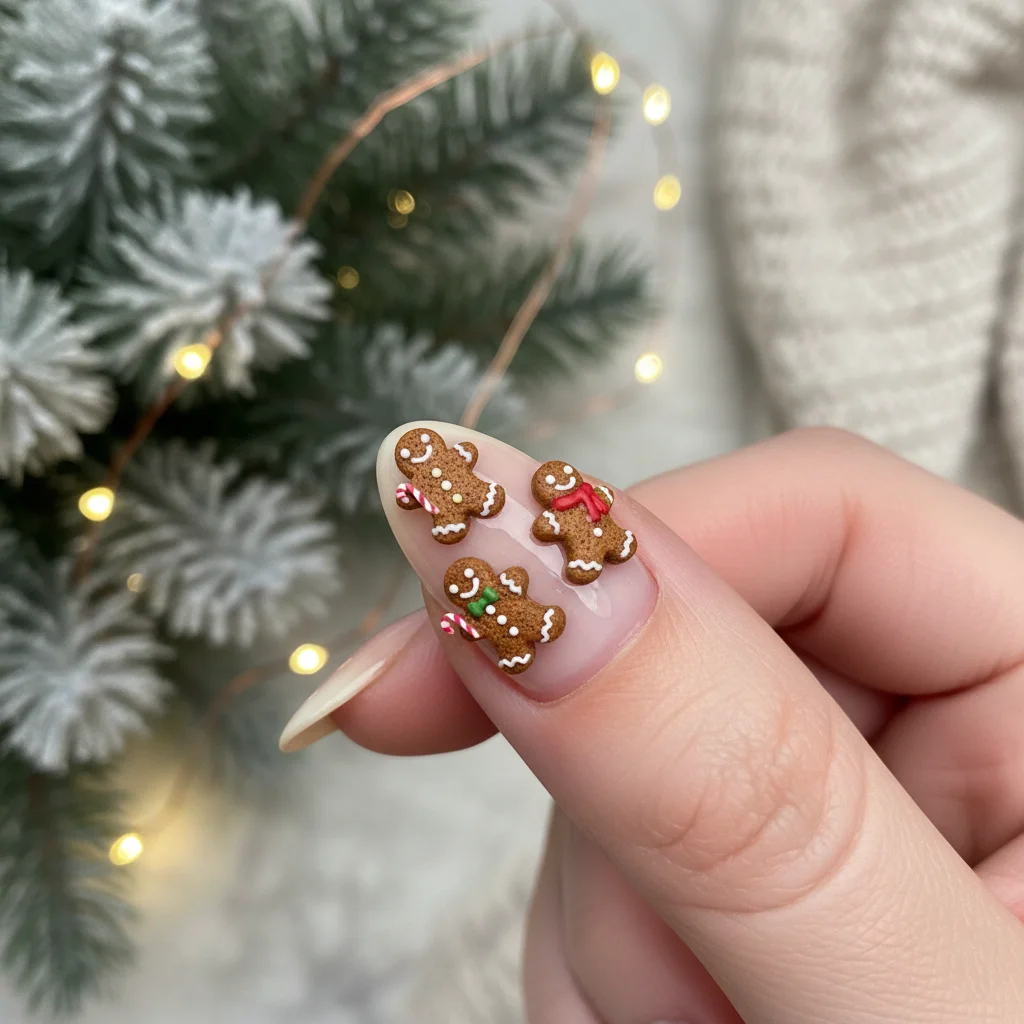
Using a tan or light brown polish, draw an oval-shaped body and a round head on a few nails. Once dry, use a very fine brush and white polish to draw small squiggly lines for the icing and tiny dots for the eyes and buttons. The trick? Keep them small and charmingly imperfect.
13. Rudolph’s Glittery Red Nose Accent
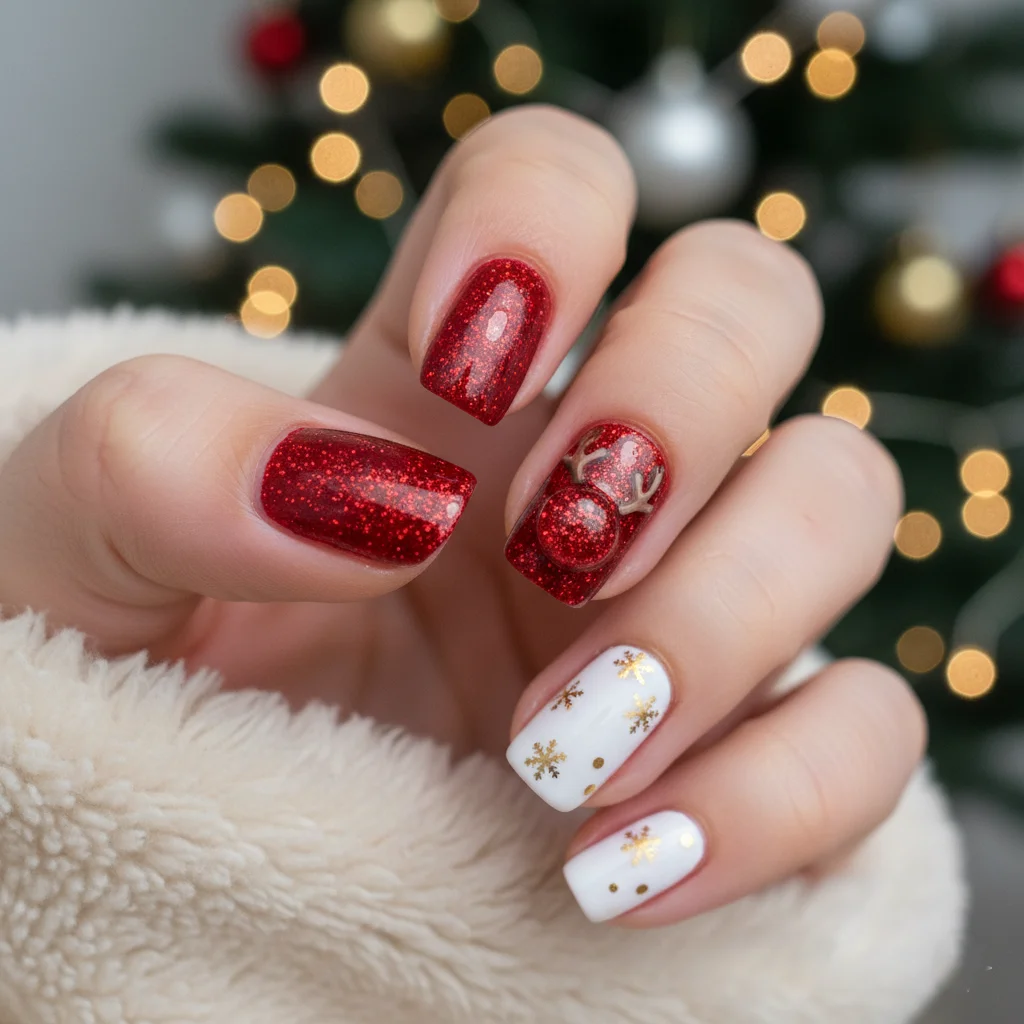
Focus entirely on the ring finger for this whimsical design. Paint all other nails a simple, festive brown. On the accent nail, paint the upper portion brown, but leave the bottom half blank. Use a large red glitter polish or a small red rhinestone to represent Rudolph’s famous nose.
14. Playful Festive String Lights
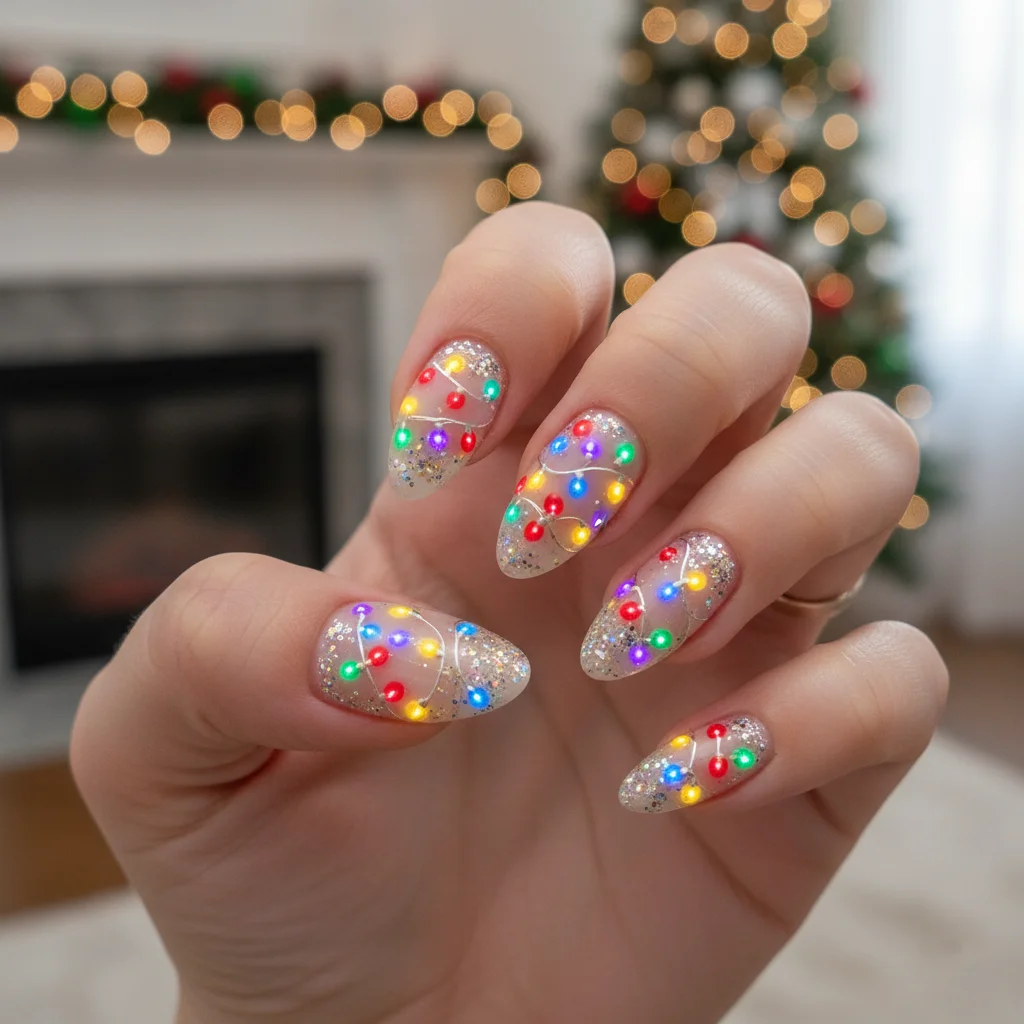
This one is easier than it looks! Paint all nails a dark color (navy, black, or deep purple). Use a fine striping brush and black polish to draw a gently curved line across the nail. Then, use a dotting tool to place bright, multi-colored dots (red, blue, yellow, green) along the black line.
15. Elf Green & Classic Stripe Combo
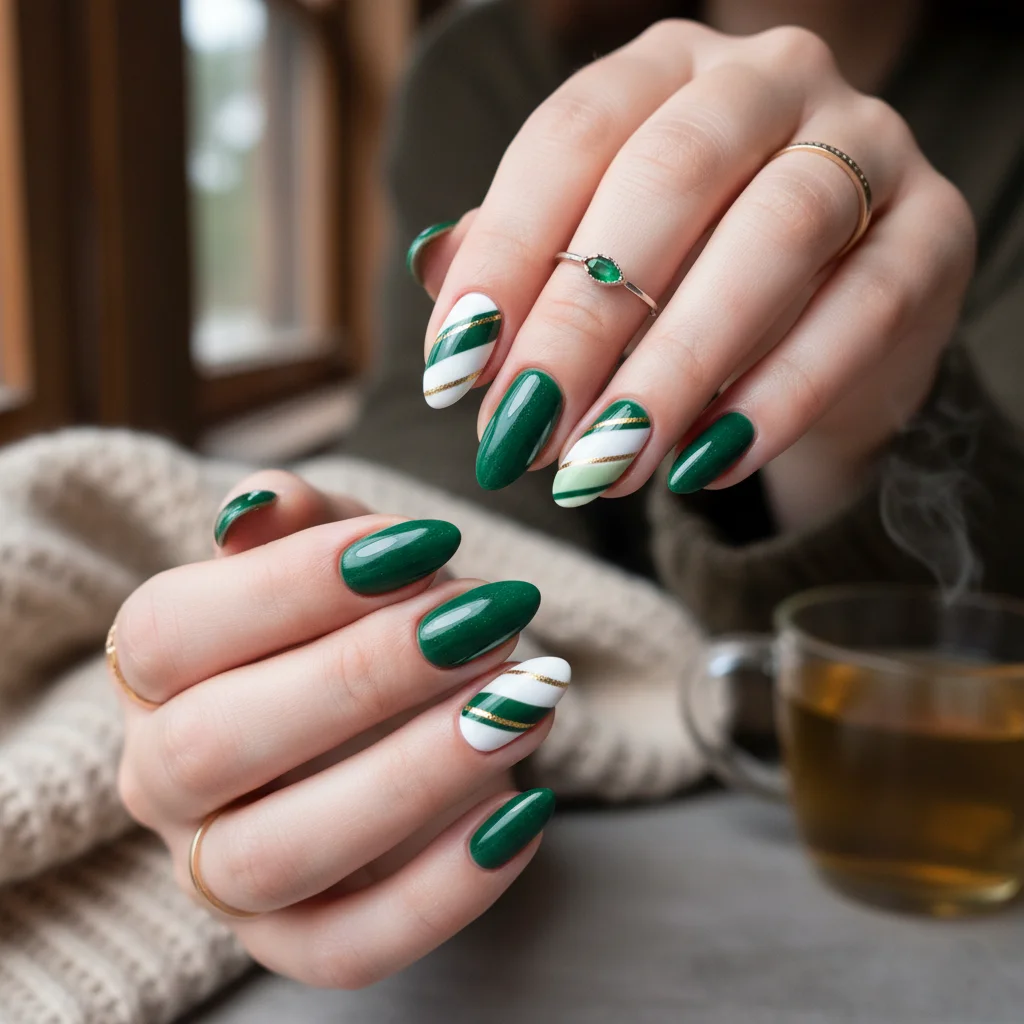
This is a fun, mismatched look. Paint two nails a bright, true elf green. Paint two other nails with bold vertical stripes of red and white. Leave one nail solid white. The joyful contrast is instantly infectious and full of character.
Snowy & Winter Wonderland Nails
These looks lean into the beauty of winter itself—ice, frost, and cool, glittering tones.
16. Icy Blue Base with Detailed Snowflakes
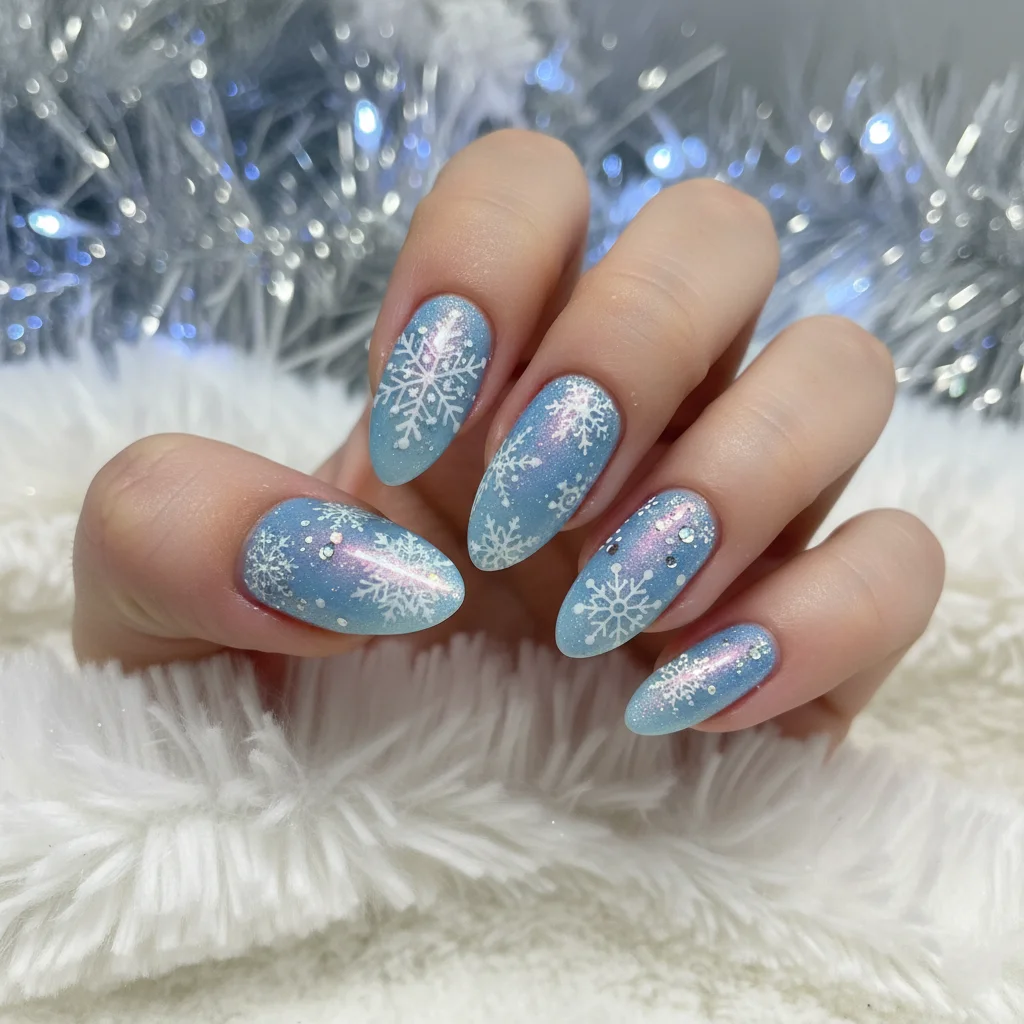
Choose a pale, pastel blue base coat. The key is the snowflake design. Invest in a good snowflake stamping plate (if you want perfection) or use a thin white brush to draw three intersecting ‘X’ shapes and add small dots to the end of each line for that complex look.
17. The Shifting Aurora Borealis Effect
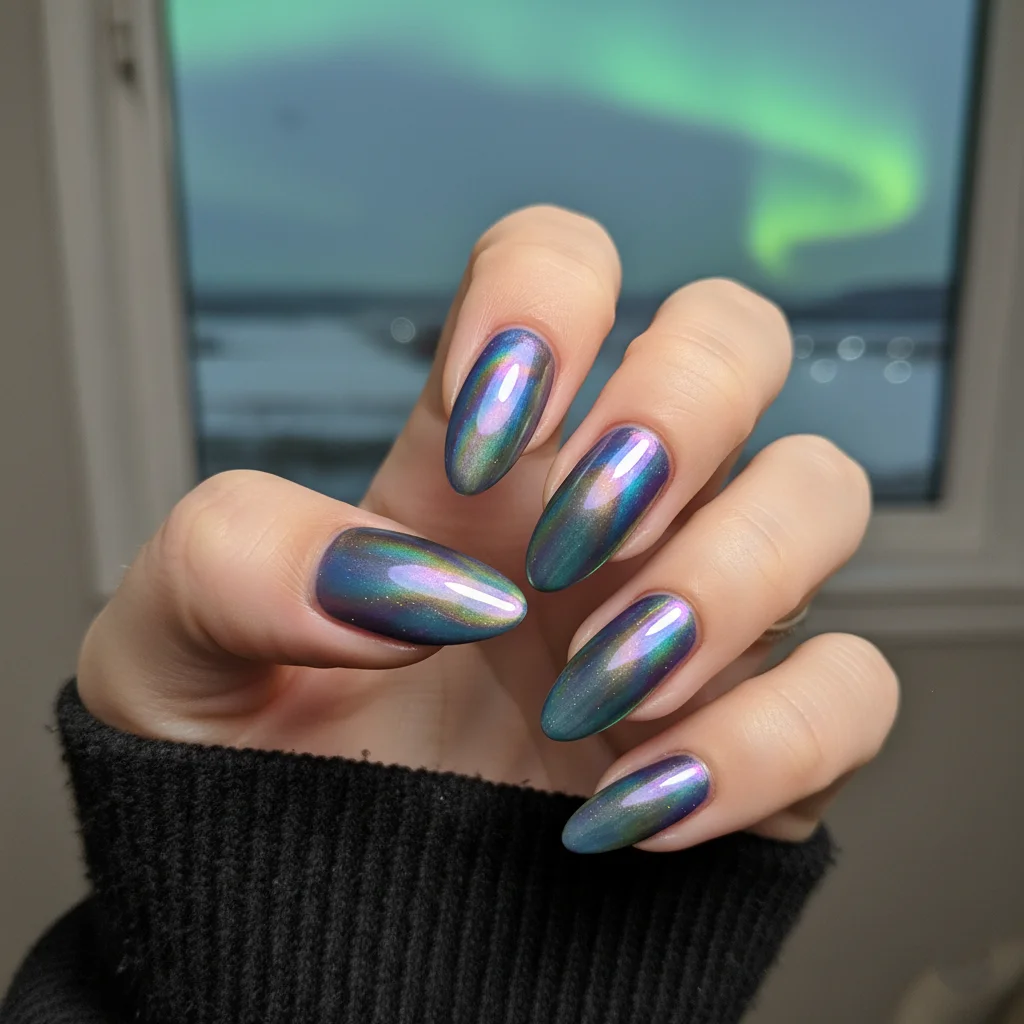
This is where you stun people. Find an iridescent or duochrome polish that shifts from violet to teal to blue, mimicking the Northern Lights. Apply it over a deep black base. Value Tip: The black base is crucial—it provides the contrast needed for the color shift to truly shine.
18. Subtle Frosted Ombré Nails
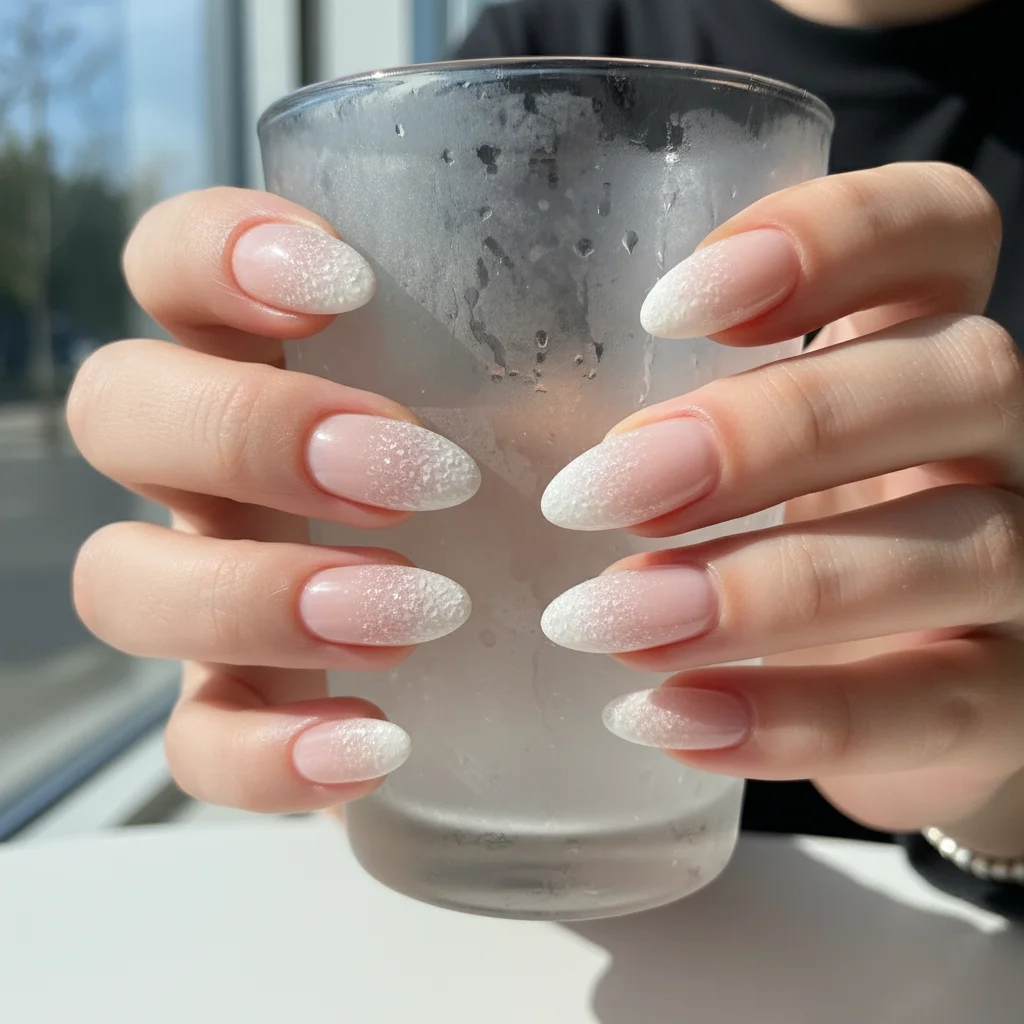
This manicure is pure elegance. Start with a nude or sheer pink at the cuticle and gently blend in a white polish toward the tip, creating a soft, misty ombré effect. Finish with a sparse layer of fine iridescent glitter over the white area, making the tips look freshly frosted.
19. Crystalized Icicle Nail Art
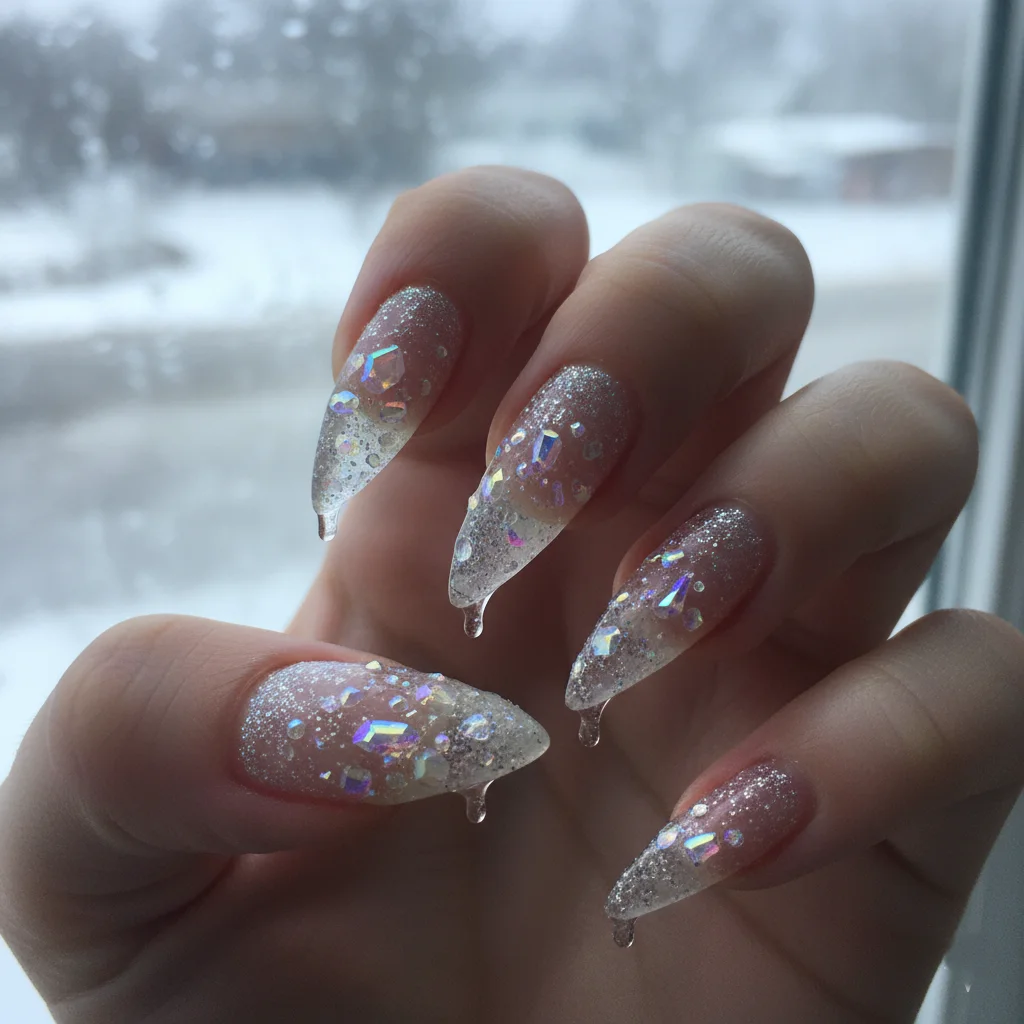
This design uses texture to create drama. Paint your nails a reflective silver. Near the tip, use a 3D gel or clear building gel to create sharp, irregular, triangular points that mimic dripping icicles. Sprinkle fine iridescent flakes onto the gel before curing to make them look crystalized.
20. Adorable Penguin Pals Design
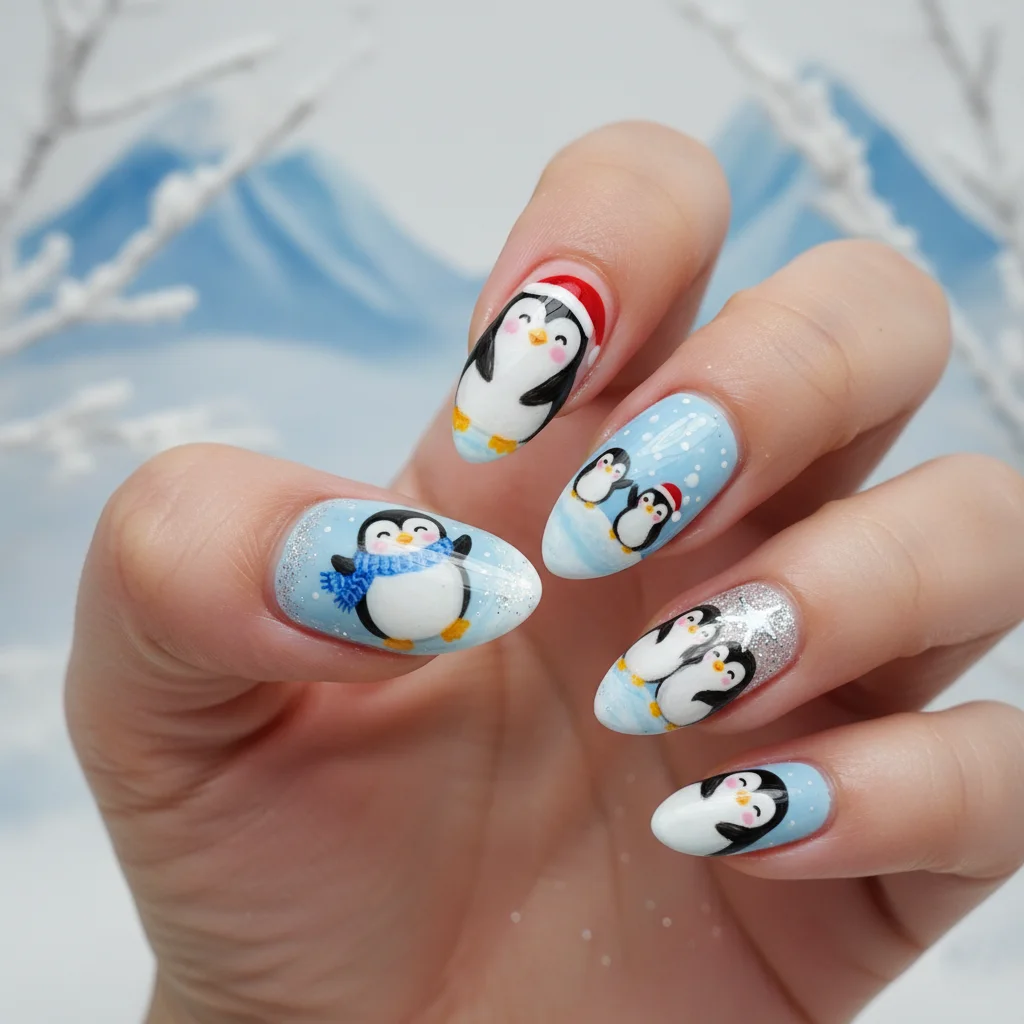
Start with a white base. Use black polish to paint an arch from the sides of the nail toward the center, creating the penguin’s black “suit.” Add two white dots for eyes and a small orange dot for the beak. This works best on a shorter, rounded nail shape.
Easy DIY Christmas Nail Designs for Beginners
You do not need professional tools or steady hands for these! These designs rely on simple techniques and minimal time commitment.
21. The Quick Glitter-Dipped Look
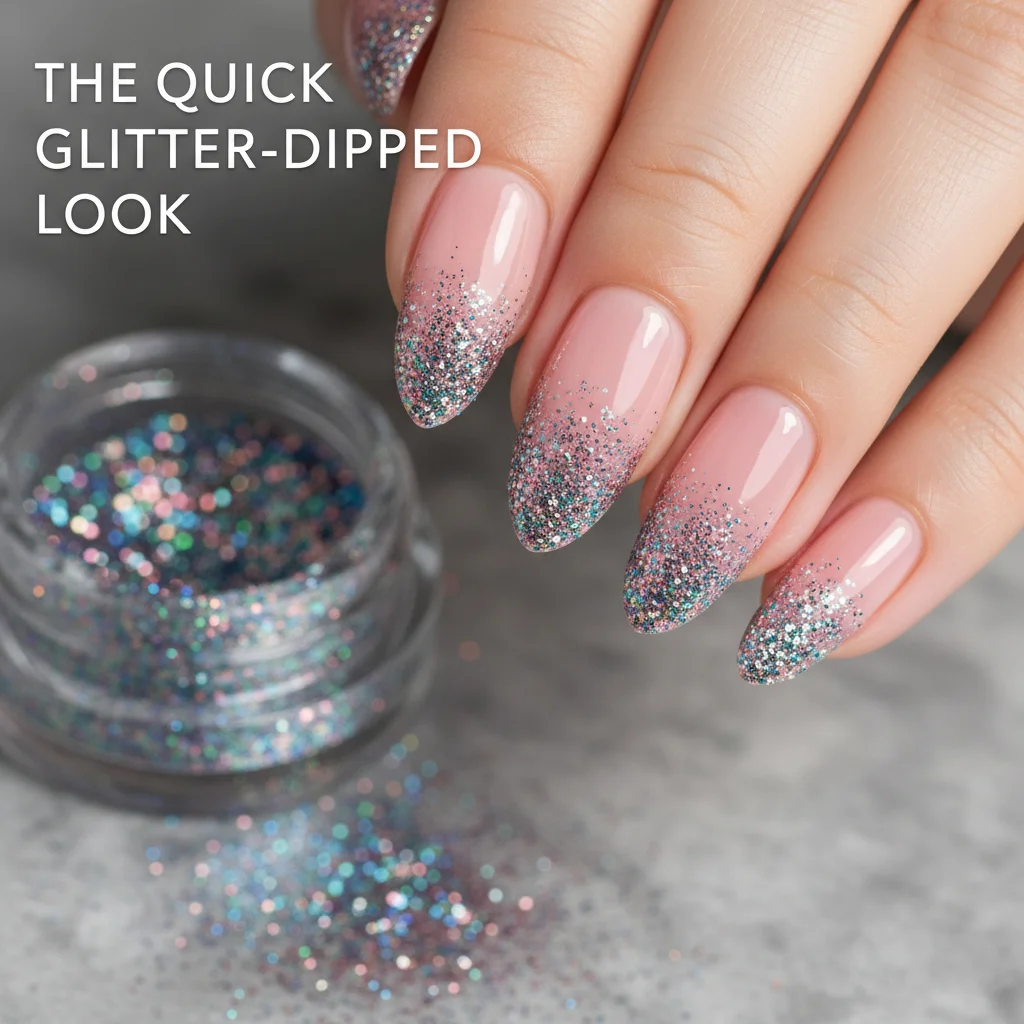
This is the ultimate confidence builder. Paint your nails a solid, festive color like burgundy or navy. While the polish is still wet, take a glitter polish and wipe off most of the excess. Brush the glitter only onto the top third of the nail, allowing the glitter to naturally fade down. No need for precision!
22. Simple Dotting Tool Christmas Tree
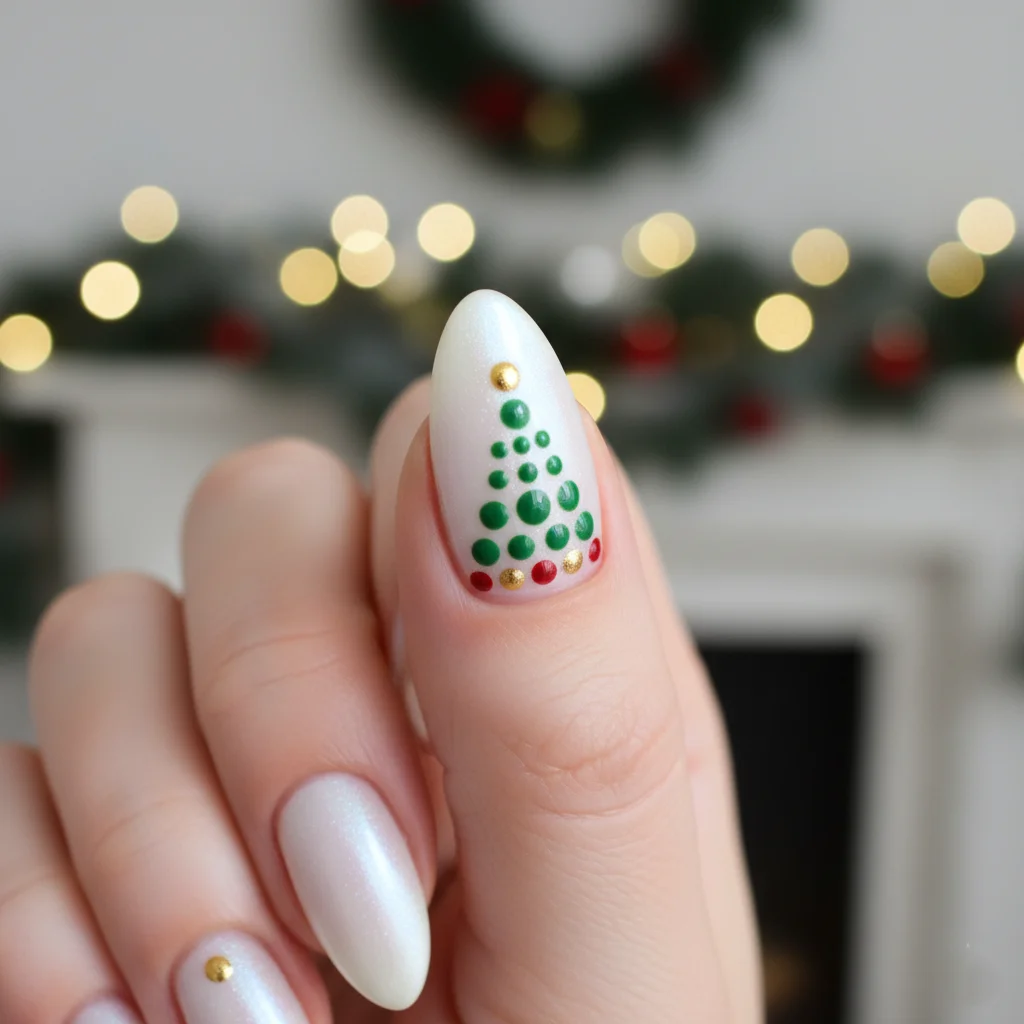
No fancy brushes needed—just a simple dotting tool or even the blunt end of a bobby pin! Paint the base a pale color. Using green polish and the dotting tool, place dots in a triangular shape, starting with one dot at the top and increasing the number of dots in each row below. Finish with a yellow dot “star” on top.
23. Tape-Off Red & Green Color Blocks
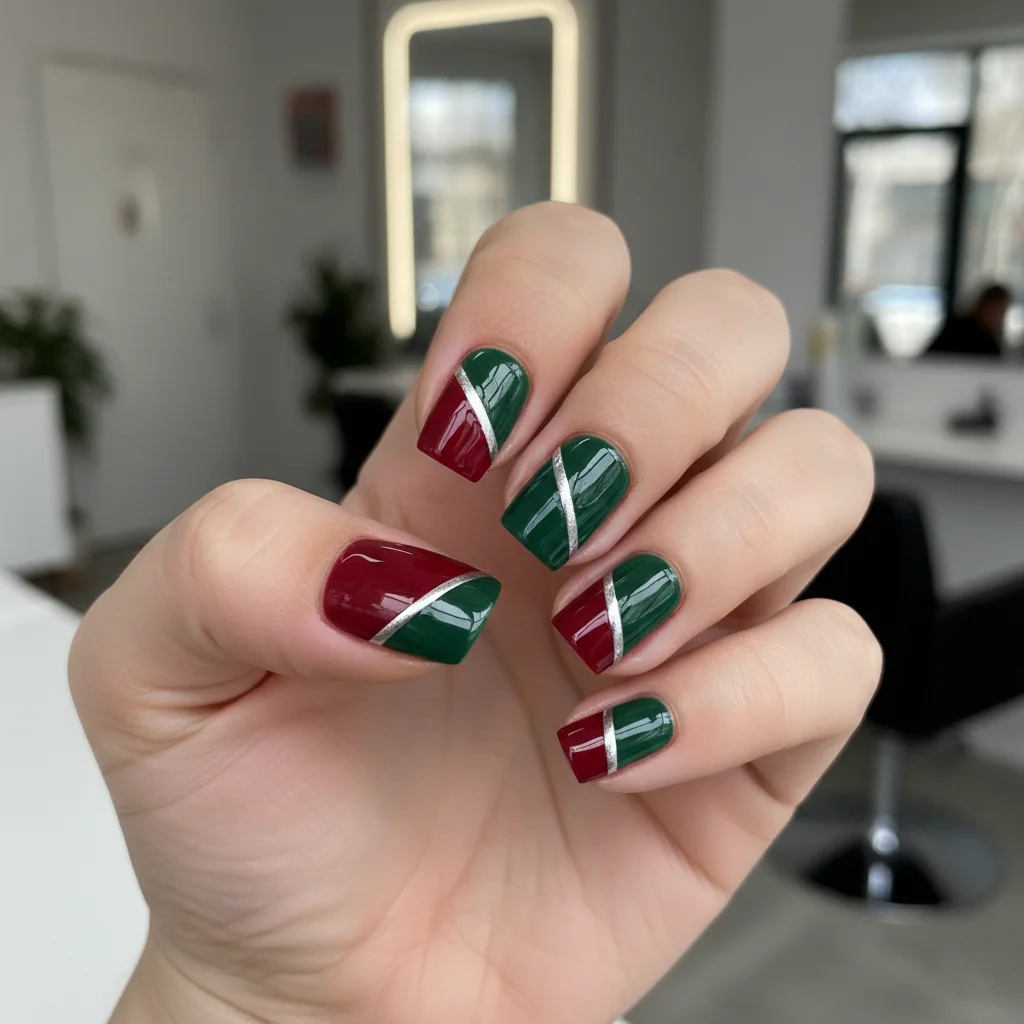
The secret weapon here is painter’s tape or striping tape. Paint your entire nail red and let it dry completely. Place a piece of tape diagonally across the nail. Paint the exposed section with green polish. Peel the tape immediately for a sharp, graphic color-block separation.
24. One-Coat Festive Glitter Base
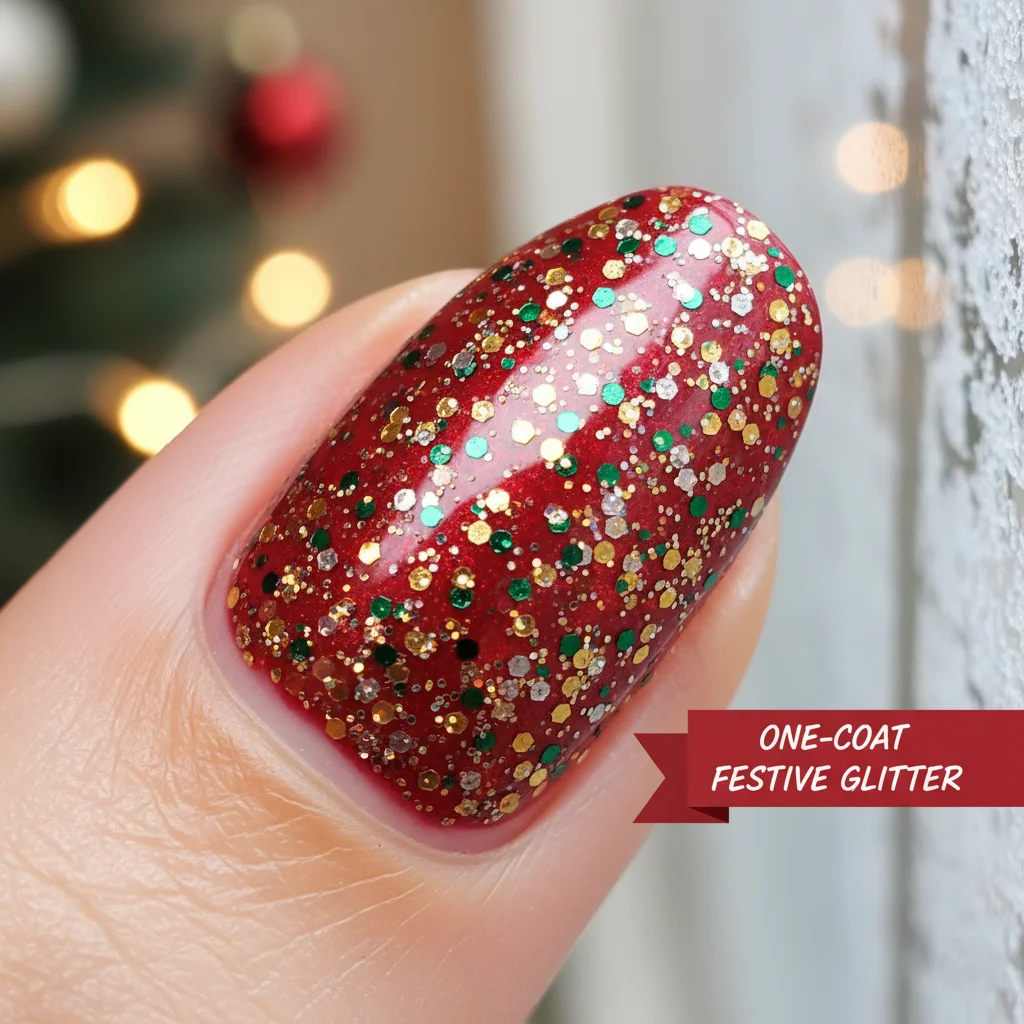
If you’re running out the door and need instant holiday cheer, just grab a polish that is all glitter and nothing else. Choose a dense metallic red or multi-colored Christmas blend, and apply one thick coat over a clear base. The depth and shimmer do all the work for you.
25. The Easiest Option: Christmas Nail Stickers
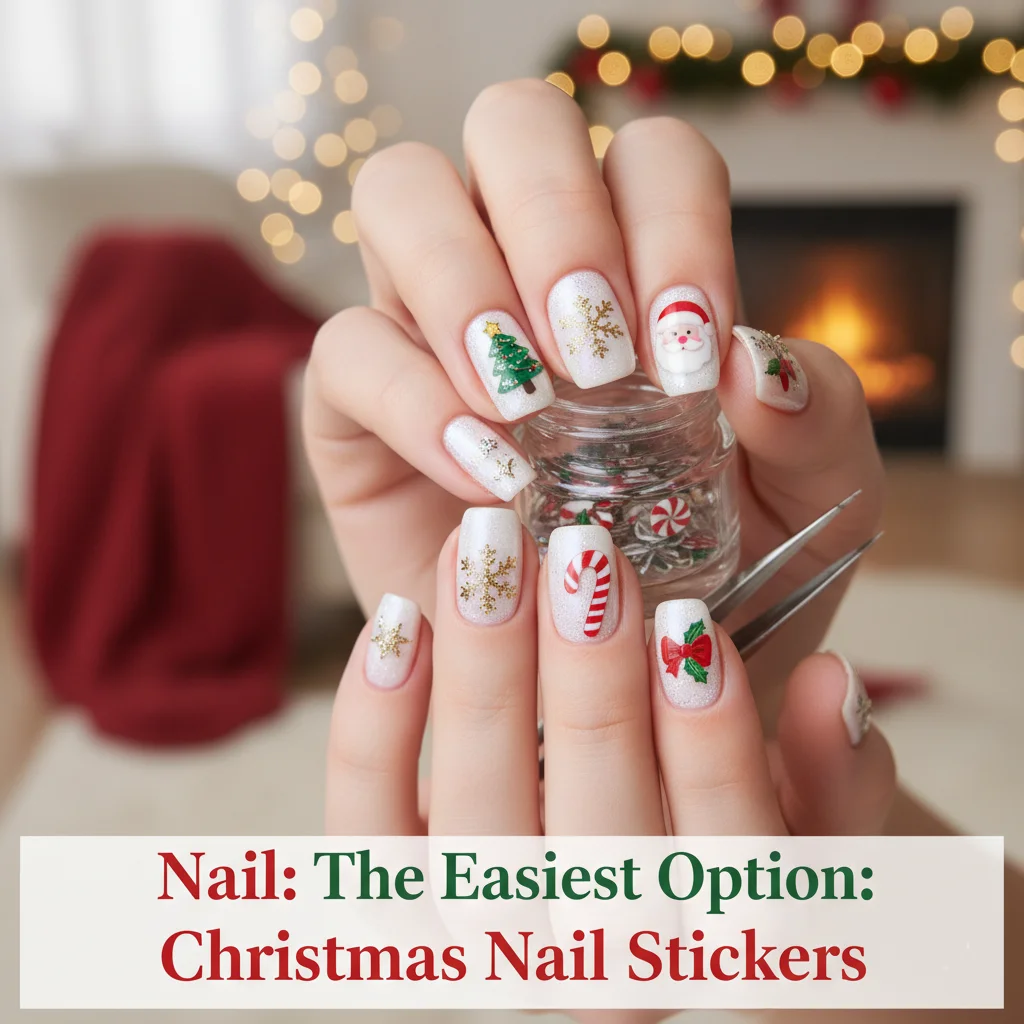
Honestly, why work harder when you can work smarter? Modern nail stickers, decals, and wraps are incredibly high quality and come in every design imaginable—from intricate snowflakes to tiny Santa faces. Apply, smooth, and seal with a topcoat. Result: Salon-worthy results in under five minutes.
How to Make Your Dazzling Holiday Nails Last Longer
You’ve invested the time, so let’s protect that festive masterpiece!
- Prep is Non-Negotiable: Always wipe your nails with rubbing alcohol or nail cleanser after filing and before your base coat. This removes oils and residue, ensuring the polish truly adheres.
- Cap the Free Edge: After applying your base coat, color, and topcoat, always swipe the brush horizontally across the very tip of your nail (the free edge). This seals the edges and prevents tip chipping, which is how most manicures fail.
- Quick Topcoat Re-Up: Apply a fresh layer of your favorite topcoat (matte or glossy) every two or three days. It takes two minutes and instantly revives the shine and strengthens the design.
The Gift of a Great Manicure: Your Next Step
We’ve just unlocked 25 ways to level up your holiday spirit, one tiny canvas at a time. If you walked into this post feeling like Christmas nail designs were complicated or out of reach, we hope your mindset has shifted. The true takeaway isn’t just a list of designs; it’s the realization that this simple form of self-expression can genuinely elevate your mood and confidence during the busiest, most chaotic time of year.
Remember the framework we shared: your hands are your most immediate form of wearable holiday cheer. Whether you lean into the luxurious texture of the ‘Velvet’ Red Manicure, embrace the chic simplicity of Minimalist Gold Flakes, or challenge yourself with the playful Gingerbread Man Minis, you now have the inspiration and the plan.
Don’t wait for the perfect moment or the salon appointment. Grab a dotting tool, find some striping tape, and start playing. Your festive feeling doesn’t have to be perfect—it just has to be authentic to you.
Which design are you trying first to make your holiday nails shine this season?


